Skirt for a big girl

Published on Sunday May 20th, 2012

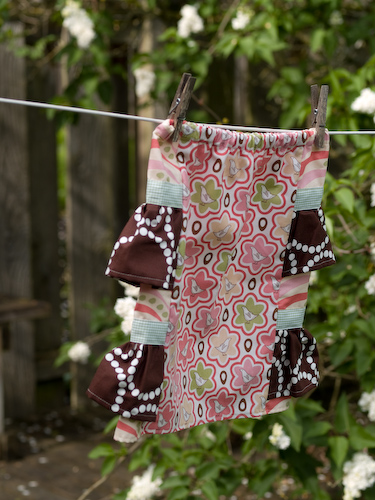
Smoke is just about rising from Signy, my trusty little Husqvarna. I finally bought a new packet of needles for her this afternoon; the one I’ve been using since we rekindled our relationship this spring is as dull as an old dog’s tooth. And she’s started to sound a tiny bit clattery. I hope a fresh, sharp needle will help, but I suspect I’ve finally run her over enough yards of fabric that she’s due for a tune-up. Hang in there, girl, because we still have a big push to bind a couple of quilts and finish a baby jacket before Little Dipper turns up. I made friends with her walking foot and successfully stitched a quatrefoil pattern all over the baby quilt. Then I got a bee in my bonnet about making a quilt as a birthday present for a dear friend. I pieced the whole top in one furious go this afternoon. But before either of those projects, Signy and I pulled together a little gift for dear Denise’s beautiful Kira, who has somehow turned three already:

Three-year-olds are still foreign territory for me, so I guessed about the size based on the Craft Council standard measurements. Also, this pattern is a little ticklish in its wording. It’s the Little Bo Peep skirt by Anna Maria Horner; the directions require that you customize the size according to the circumference of the child’s waist (sounds good, right?) but then begins rather airily to refer to the “width” of the skirt when you cut the front and back panels. One possible interpretation is that “width” = the circumference measurement you’ve just written down. But this would result in the skirt hem being roughly three times the child’s waist measurement, and that sounded awfully floofy and didn’t seem to match the illustrations. Searching the internet to see what others had done was inconclusive. So I went with the theory that “width” = half the circumference. But I fear this skirt isn’t quite ample enough for a three-year-old to really run and play in. If I make another, I’m going to cut front and back panels three-quarters the waist circumference.

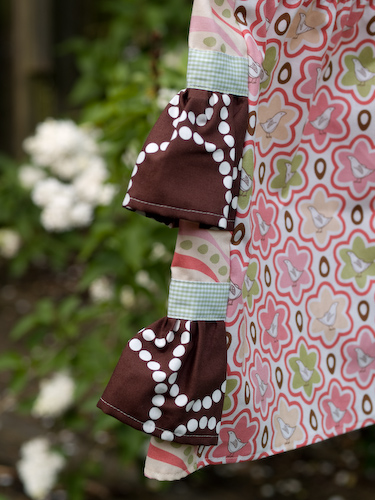
But once you’re past that hurdle, there are some nifty skills a person can learn in making this skirt, I’ll tell you. Oh, la la, French seams! Ruffles!

These weren’t my first ruffles, but I couldn’t have picked a French seam out of a line-up until now. I followed Anna Maria’s instructions with no idea what I was actually doing… hey! Lookee, Ma! The edges are tucked away forever in a neat little casing! I love a chance to conceal a raw edge, although the result (at least as executed in quilting cotton) is a bit bulkier than seems ideal in a garment this size.

All in all, a good learning project, and a quick handmade something for a special girl. Next up, Signy gets a well-earned rest while I hand-tie a quilt for the first time (It looks pretty easy. Famous last words, right?) and sew snaps on a very wee baby cardigan. I think this may be how I nest. Violent cleaning of the house would probably be more virtuous than tearing around in a whirlwind of needles and wool and poplin. But not nearly as much fun.

A BSJ for Minnow

Published on Wednesday July 28th, 2010

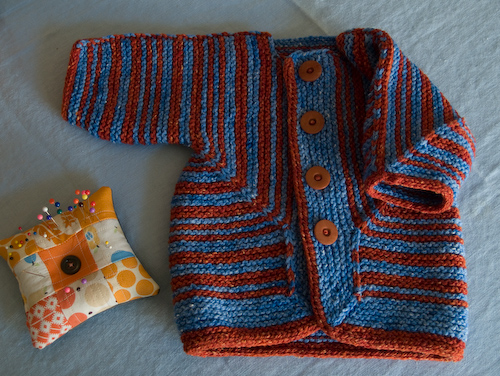
I’ve been a devotee of Elizabeth Zimmermann since the day I discovered her work. Given that I didn’t learn to knit until after her death, I’ve got nothing on the hordes of knitters who have revered her for half a century. In fact, it was just about exactly four years ago that I ran across a dog-eared copy of The Knitter’s Almanac at Powell’s and shortly thereafter launched Zimmermania and began Mr. G’s Fishtrap Aran, which is still one of my most prized accomplishments.  But the first of Elizabeth’s designs that I completed was the Baby Surprise Jacket. I made one for Misa & Morgan’s son that same autumn, and about two years later I made another for their daughter. Both these little jackets have been lovingly passed on to other friends with babies, which delights me and assures me that this design is a true classic destined to be appreciated for as long as we have  wool and sticks to knit it with and babies to bundle into it. So I could hardly let my own spawn weather its first year unSurprised.

MinnowBSJ1

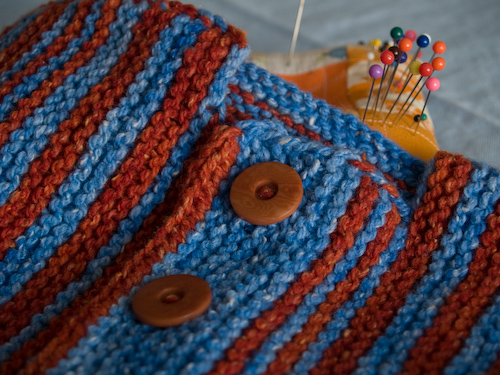
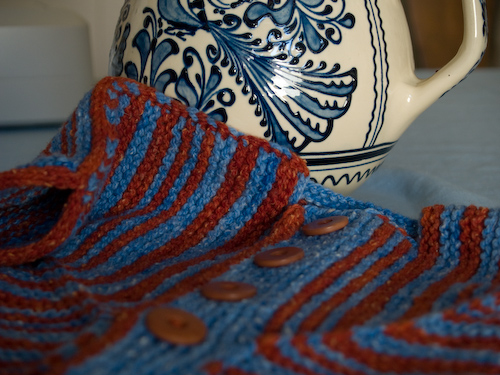
Orange and blue are kind of a thing for us — Mr. G injected his own aesthetic sense into our wedding by selecting a bright orange tie and socks, and at the time I wasn’t so sure about his choice. Orange seemed weirdly autumnal for a June wedding and didn’t exactly provide any continuity with the blue bridesmaids’ dresses or the ocean backdrop. But I ended up using the tie to bustle my wedding dress so we could have a proper dance, and I’ve been fond of orange and blue together ever since. (And if my grandchild ever decides to make a quilt out of the hopelessly dated but sentimentally valuable clothes we’ve left behind, I hope that orange tie will be in it.)

This orange and this blue are Miss Babs’s Cumberland Sport, hand-dyed on an 80% wool and 20% cotton base from Green Mountain Spinnery. Miss Babs has discontinued the yarn and the remainder of her stock is on sale, which is where that link will take you!* This is good stuff, rustic and tweedy and sturdy and minimally processed, and Miss Babs’s dye process complements the yarn beautifully. I had Sky and French Marigold, one skein of each. I ran out of the Sky just a few garter ridges shy of where I’d hoped to stretch it, but oh well.

MinnowBSJ2

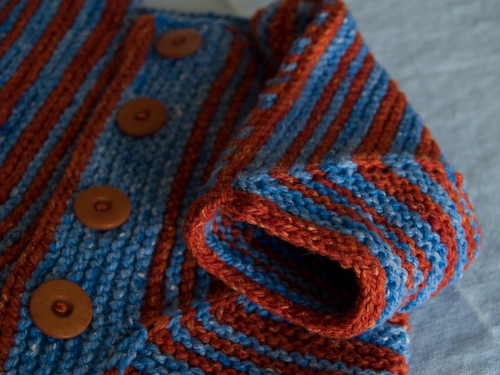
Every time I do a BSJ I try something a little different with the details. Here I opted for a centered decrease that I slipped on the wrong side to create that architectural miter, and I continued the effect by (wrong-side) slipping the stitch between the paired increases on the body portion, too. I wanted i-cord edging in the orange, and remembered having learned from Joyce Williams (at Schoolhouse’s Knitting Camp two years ago) a way of concealing the blips of blue base color that you get from doing an applied i-cord edge in the standard way. But I couldn’t remember just what that was, and I was down at the coast**  and hadn’t brought my notebook. So I used technology. I borrowed my husband’s iPhone to email a cry for help to Jen, which I figured was the best possible move. Not only does Jen epitomize the kind of thorough, curious, experimental-yet-steeped-in-tradition, and encyclopedia-brained knitter that you want to know when you’ve got burning questions about technique, but she was actually AT Knitting Camp in the PRESENCE of Joyce Williams at that very moment. (And yes, I was wild with envy.) Jen sent back these instructions:

From Joyce herself:
(co 2 & slide to right of garment sts)
*K2, sl1, yo, k1, psso [return 3 to left needle]*

It’s the yo that makes it blip less
Hope you’re having a good weekend! Joyce says to tell you hello!
j

Sent from my iPad

(I think I may need one of these iPads at some point.) After a couple of false starts for which I blame third trimester pregnancy brain, I got my i-cord going. But I was still seeing just a wee bit of blue through the orange. So I unvented this variation, which looks a bit like it’s been partially crocheted and therefore isn’t quite as natty as regular i-cord to this knitter’s eye, but totally hides the base color:

CO 2 and slide to the right of the live garment sts. *K2, yo, sl1, k1, pass over yo and slipped st, return 3 sts to left needle and rep from *.

MinnowBSJ3

Try it or stick with Joyce’s way — as Elizabeth would say, “Knitter’s choice!”

I also mucked about with a reinforcement of the traditional yo-k2tog buttonhole, as I’m always bothered by that untidy strand of yarn that occurs on the following row and can later confuse you about which hole you actually want to poke the button through. Here’s what I came up with:

On the return (WS) row, k tog the stitch preceding the buttonhole with the front leg of the yo, but don’t slip the yo off the needle. Bring the yarn forward and over the needle to trace the path of the yo yarn, then carry on knitting as usual. On the next (RS) row, k tog the two yo strands as one st. (Note that this is for garter stitch; if working in stockinet you’d purl rather than knitting on the WS row.)

It seems to create a firmer buttonhole, which can be good if your buttons aren’t large enough to be a nice tight squeeze through the regular kind of hole. Anyway, I like it when knitters share their dabblings, so I thought I’d put some of mine up here.

But enough knitterly minutia. I love this little jacket and I can’t wait to wrestle my baby’s pudgy little arms into its stripey sleeves.

MinnowBSJ4

*I’ve been there ahead of you and stocked up on Pewter and Light Turquoise. Because Minnow’s going to need a Tomten for the winter after this one.

**More on this little getaway next time. Mr. G took some fine pictures in Ecola State Park. You couldn’t have convinced me beforehand that even gentle hiking’s fairly grueling for the nearly-nine-months-pregnant body, but it was well worth being sore and tired and having extra contractions the next day.

Baltic Rose

Published on Tuesday March 2nd, 2010

Good for one Knitting Olympics finisher’s medal:

BalticRose

About this lever knitting business: several of you asked why I’d want to learn a whole different way of knitting, and it’s a good question. I am the kind of person who wants to know about this kind of thing just because it exists and because it’s so significant to the history of the craft (knitters who had to work fast enough to earn a living at it knit this way; our more familiar throwing and picking styles emerged from a desire to make the process of knitting look more ladylike).  I can’t yet lever knit effectively enough to make it faster than my usual throwing. But it does, in the mean time, let me use my hands and wrists in a different way, and as I now know from my class with Carson Demers, that’s a good thing. My work is all about using the computer, and between that and my knitting habit I’ll need to be careful if I want to avoid repetitive stress injuries. I was almost the only person in Carson’s class at Madrona who didn’t already have problems in the wrists, elbows, or shoulders, and I want to be able to knit in comfort until I’m dead. So changing up the positions in which I knit is a really good idea.

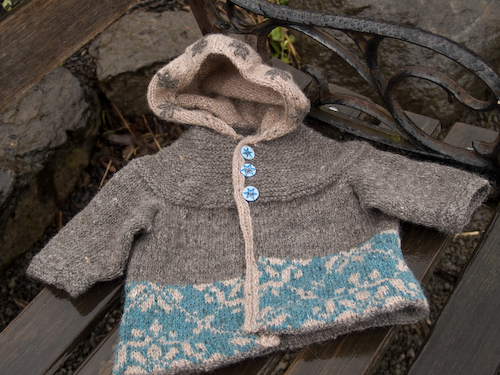
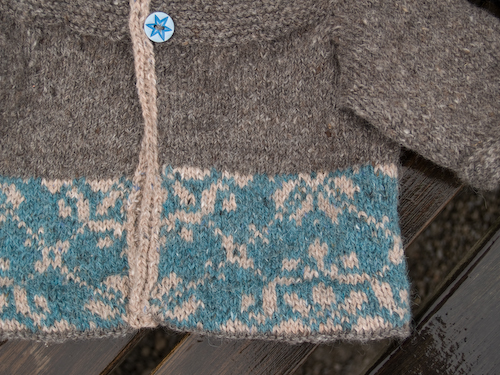
So back to this little practice sweater. I had the one lovely skein of Toots LeBlanc Jacob/Alpaca DK, but I knew it wouldn’t stretch to a whole sweater. I had some Rowan Felted Tweed in the stash that was about the same weight, so I figured I’d add a hem in colorwork. I thought I remembered Lizbeth Upitis’s Latvian Mittens having some nice large botanical motifs, and sure enough I opened the book right to the page with the chart for Graph #53: District Unknown. And I only needed to increase three stitches to fit in three repetitions of the motif.

BalticRose_hem

I only worked half the chart because I didn’t think a long cardigan would be very practical on a three-month-old, but I quite like the sort of wallpaper effect that results.

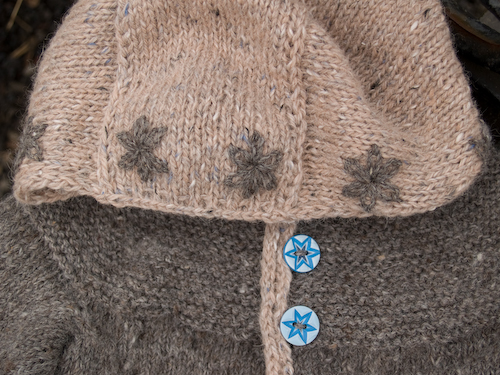
There was still the problematic neckline to deal with, though. I tried tacking it down a couple of different ways, but I just wasn’t satisfied. A hood seemed like the best solution, so I quickly knit one up in the Felted Tweed. And since I’d already given up on this little cardigan being unisex, I thought I’d use the last yard of the Toots LeBlanc for a little embroidery to match the buttons.

BalticRose_hood

Ta-da! Another little sweater banked against the onslaught of 2010 babies. I really want a whole grown-up sweater’s worth of the Jacob/alpaca. So tweedy. So full of character. Love it.

The sum total (but not really)

Published on Monday February 15th, 2010

Madrona2010

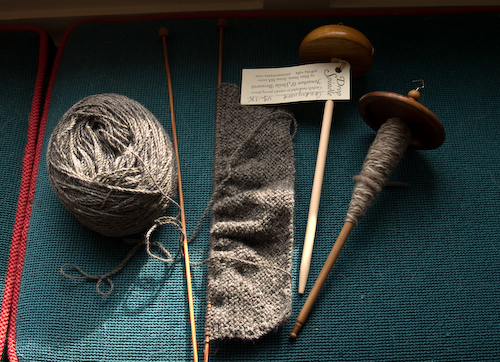
This is everything I accomplished at Madrona. Not a lot to show for myself, is it? On the spindle is a small quantity of really softly spun Cormo and CVM 2-ply, and on that loooooong straight needle is about 20 ridges of garter stitch in really yummy Jacob/alpaca DK from Toots LeBlanc.

But I can now tell you what cop is (the yarn you’ve made that’s wound around the spindle), I can use the drop spindle standing up (a really good idea, as I’ll explain later), I can do a thigh twist to start the spindle (standing on one leg, even), I can kick start it when it’s near the floor, I can fix thick spots in the yarn and do a better join when I need to “edit” a thin spot, I can keep twist out of my draft zone by back-twisting with my right hand just a little bit, and I can ply out of my bra.

Yes, you read that right.

Turns out a good way to ply two or more strands is to wind them together onto a crumpled ball of paper, pop the resulting ball down your cleavage, and wield the drop spindle pulling the strands from between your buttons. If nothing else, this is certainly more eye-catching than my old method using the chopstick apertures in my two rice bowls.

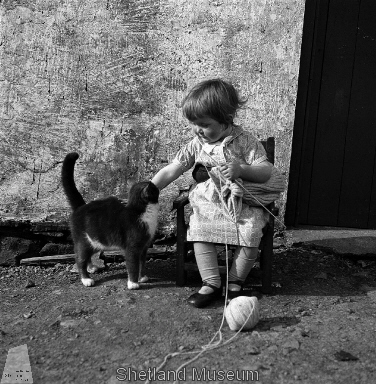
And I’m darn proud of my 40 rows of garter stitch, because I achieved them by lever knitting. That means the technique for knitting that relies on one needle being fixed under your arm, in a belt or sheath, or wherever you can comfortably plant it and then bringing the knitting to the fixed needle tip rather than fishing after it. I’ve read about it — this is how the Shetland knitters made their beautiful jumpers on long, long double-pointed needles before circulars were invented — and now I know (in theory, at least) how to do it. It feels just as clumsy as whatever knitting method you use felt when you first tried it. Stephanie assured us we would all suck, and she was perfectly right. This tiny girl is clearly beating me around the block:

Shetlandgirl

This photo is from the Shetland Museum Archives and is proof I will always reach for in the future if I need to argue that small children are capable of intellectual focus and remarkable dexterity… and of not poking their eyes out with tools. This tot’s grasping a set of needles that are longer than her legs, and she’s already knit half a sweater with them. Awesome.

Anyway, Stephanie challenged us to practice lever knitting just a little each day for 30 days. And since I can’t back down from a challenge, I vowed I’d lever knit a baby sweater in that time. Hence my 20+ ridges. Which I’m going to add to right now while I watch the men’s downhill. Next time I’ll tell you about my final Madrona class, Knitting Happily Ever After.