The technical bits
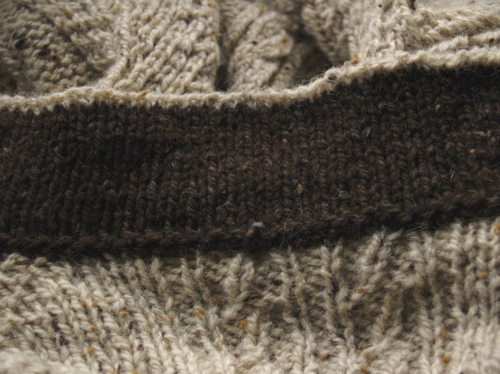
I haven’t forgotten that I promised some more construction details for the Fishtrap Aran. Mr. Garter has been wearing it regularly (I think he slept in it one night when he crashed on his parents’ couch after a late-night work session with his dad) – so regularly, in fact, that he’s already fuzzing up the collar lining. It didn’t begin to occur to me that the mature gentlemen among us grow bristly little hairs out of their necks and chins that have the same effect on soft wool yarns as wire brushes. Curses! Mr. Garter is under orders to shave twice a day if he wants to zip his Fishtrap all the way up. I’m partly kidding, but he gave me this innocent look and said, “Well, isn’t that why you put a liner in it? So you could take it out and knit me a new one whenever I need it?” I think I hardly need to describe the dirty look he received in return. Here’s the collar lining all pretty and new:

For those of you wondering about the zipper insertion and finishing technicalities, here’s some more detail. I began with a crochet steek. There seem to be several different methods floating around on the internet with excellent tutorials, but I did it the simple way Jen taught me.
1) Leave an extra allowance of three stitches for the steek when you begin the knitting. Twist the stitches on either side of this column for a neat, crisp edge.
2) Weave a line of bright waste yarn down the center of the stitch you’re going to cut – the middle column of the three.
3) Here’s a diagram of your three stitch columns:
\/ \|/ \/
\/ \|/ \/
\/ \|/ \/
123456
The numbers correspond to each side of the stockinet V’s. The vertical lines down the center are your waste yarn, marking the steek line. This is where you’ll cut.
4) Using a finer weight yarn that matches the main sweater yarn (I used Jamieson Shetland Spindrift in Moorit, which matched the Ballybrae Blainin Tweed beautifully), crochet a single chain line by inserting the hook under 5 & 4, drawing through a loop, inserting the hook under 5 & 4 in the next row down, etc. Then chain together the 2’s & 3’s in the same manner up the other side. For an armhole steek, you’ll work a continuous chain down one side, under the bottom of your steek line, and up the other side. For full cardiganization, you’ll want to let your chain trail off to either side at the tops and bottoms for a few extra stitches to secure your work. Later you can unpick these extra stitches and weave in the resulting end. At any rate, you never want to cut across your crochet chain.
5) Cut along the line between 3 & 4, which you marked with your waste yarn, pulling the waste yarn out as you go along. It’s really easy to see the little horizontal bars to cut if you’ve done your crocheting properly – you’d have to work at it to cut in the wrong place.
6) The cut edges will naturally roll inside, and with some handy steam action from an iron, you can easily persuade them to stay there. You want the crease to leave your neatly twisted edge stitches, well, right on the edge.
For the armholes, you’ll want to tack down the cut edges on the inside in the same yarn you used for the crochet job. I used a herringbone stitch per EZ’s instructions – very tidy indeed. As you can go along, you can tuck in any raggedy cut strands that might be rearing their heads, and the herringbone stitch will batten them into place, never to worry you again. Skim the thread or light yarn through the body stitches so it won’t be visible from the outside of the sweater.
Now sew in your sleeves, attaching them to the running bars between the twisted edge stitches and the crocheted edge. I promise, it will be obvious what I mean. This leaves your twisted stitches as a neat divider between sleeve and body.
Time to sew in your zipper. For the love of Pete, make sure it’s the right length. Insert yourself or your subject into the sweater and double-check your zipper length. Begin by pinning the zipper in place. I used these nifty two-prong pins my mother-in-law gave me. I have no idea what they’re actually called, but they worked perfectly. Make sure the steeked edge stays rolled under as you pin. With thread that matches the sweater yarn, whipstitch the 1’s and 6’s to the zipper about half a centimeter from the teeth. Use small stitches, or the zipper won’t feel firmly attached to the sweater fabric and may not stand up to manly tugging. (I wouldn’t want to test it, would you?) The whole zipper sewing process is easiest if you unzip the portion you’re working on.
Once the zipper is in, you can sew in ribbon facings to cover the back of the zipper, or you can do as I did and knit contrasting facings. A six-stitch stockinet strip worked well for me. Again, when sewing it in, skim the needle through the surface of the sweater fabric, but do not penetrate or the stitches will show through. Last of all, work two lengths of i-cord in the sweater yarn – I made a four-stitch cord – to conceal the zipper from the outside. This also has the virtue of covering any ugliness that may have happened in the whipstitching.
Pictures. Want pictures? Of course you do.
Clockwise from upper left: the sleeve join, right side; inside of armhole steek showing herringbone stitch; different view of armhole steek; zipper, showing slatternly whipstitch attachment; zipper facing on the inside; i-cord concealing zipper from the outside.
I know it’s hard to see the herringbone stitch. If this were a proper tutorial, I’d have done it in a bright color so you could see the thread. But I was going for tidy and unobtrusive.
I’m intrigued by the sculptural and textural properties of this sweater, especially when it’s all crumpled and inside-out. The Fishtrap pattern is a freaking piece of art. Elizabeth Zimmermann sure knew what she was doing.


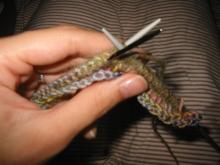
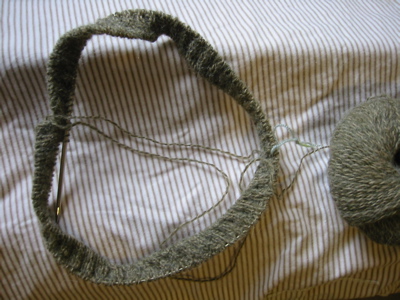
 Yes, friends, that is a genuine tubular cast-on. And it isn’t as tricky as you might think. It works roughly like this: Grab a set of needles 2 or 3 sizes smaller than you’ll need to get gauge for the project. (I’ll be knitting the gansey on US#6s, so I used 4s.) Cast on half the number of stitches you need in a smooth waste yarn. Purl one row, and then knit an elongated row (wrapping twice around the needle – pick up only the first loop on the next row). Then purl a row with the regular yarn and work three more rows in stockinette. Now the fun begins: use a skinny little needle (I used a little #1 circ) to pick up the bumps of main yarn you can see between the elongated waste-yarn stitches. Now you have the full number of stitches, but on two different needles. For a 2 x 2 rib, using the free larger needle (#4), purl two stitches from the large needle, then knit two stitches from the skinny needle. Then purl two more from the large needle, knit two more from the small needle, etc. Continue across the row, and on the next row, switch to the needles you’ll use for the body of the project (#6). Now you can snip out the waste yarn. Voila! A smooth, tubular edge!